To the question: What is a Vernier Caliper? You can be answered with a large amount of information.
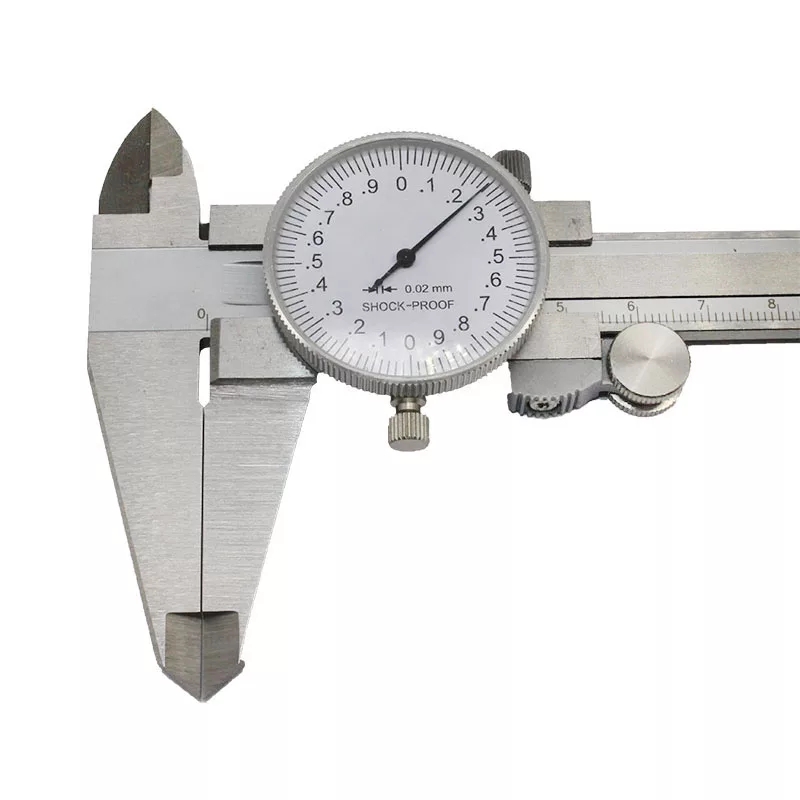
The vernier caliper is a measuring instrument of high precision used to measure small distances and measuring both millimeters and inches.
This instrument is made of hardened and rectified stainless steel in addition to a special paint that allows correct and easy visualization between the numbers and their divisions.
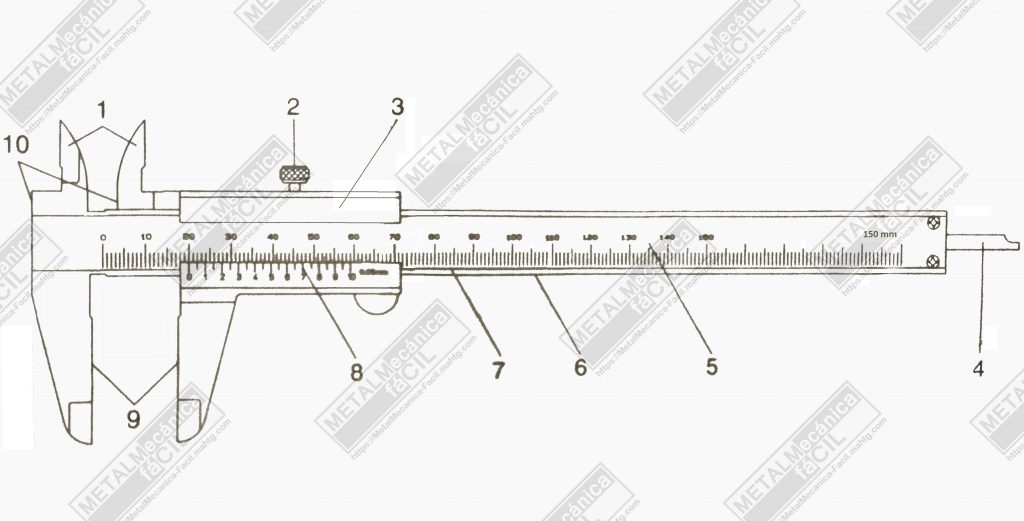
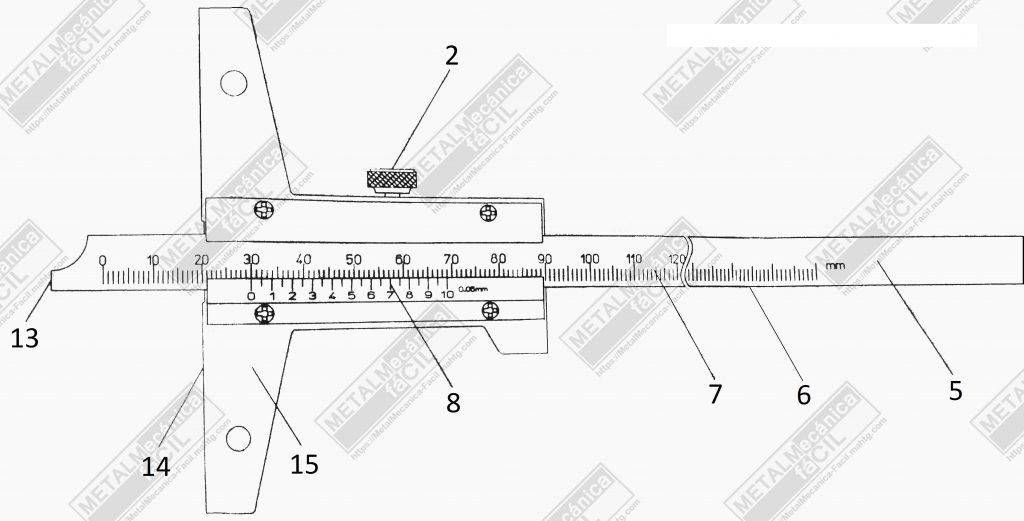
Mechanical Parts:
- Inside measuring jaws.
- Clamp screw.
- Slider.
- Depth bar.
- Main beam.
- Reference surface.
- Main scale.
- Vernier caliper scale.
- Outside measuring jaws.
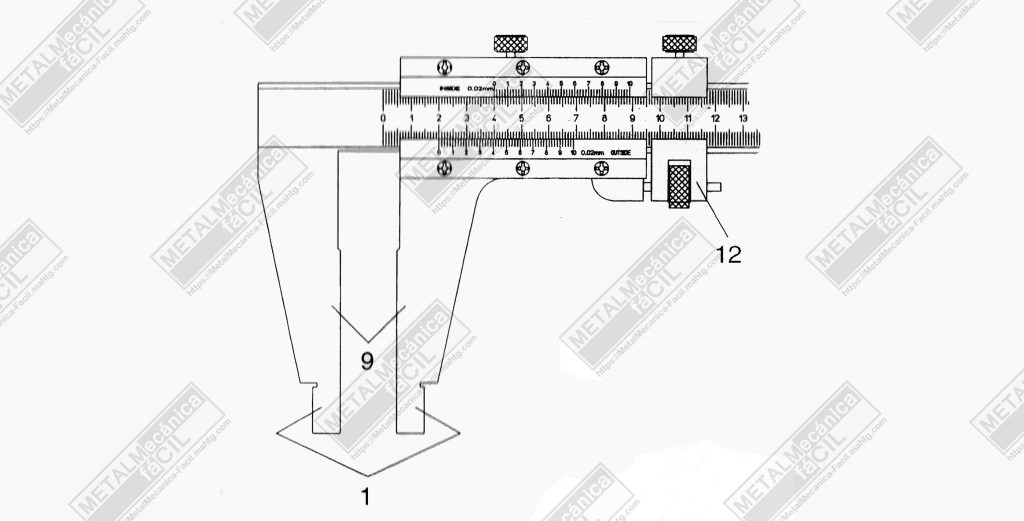
- Step measuring face.
- Thumb clamp.
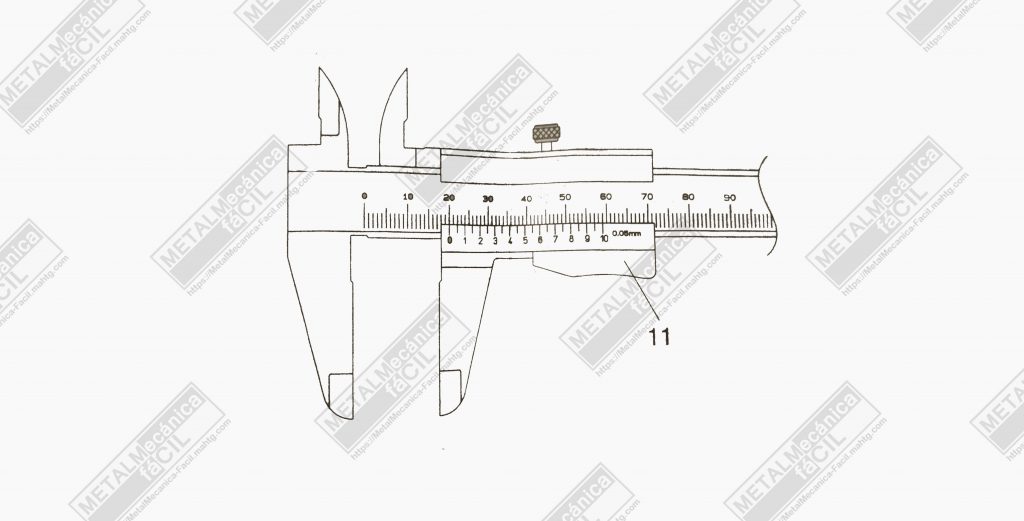
- Fine adjustment.
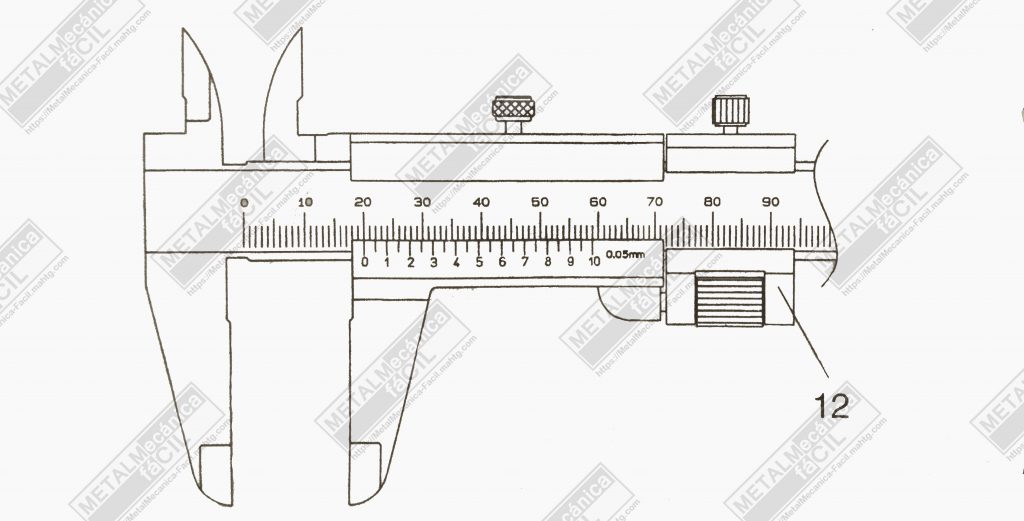

- Measurement face
- reference surface.
- Base.
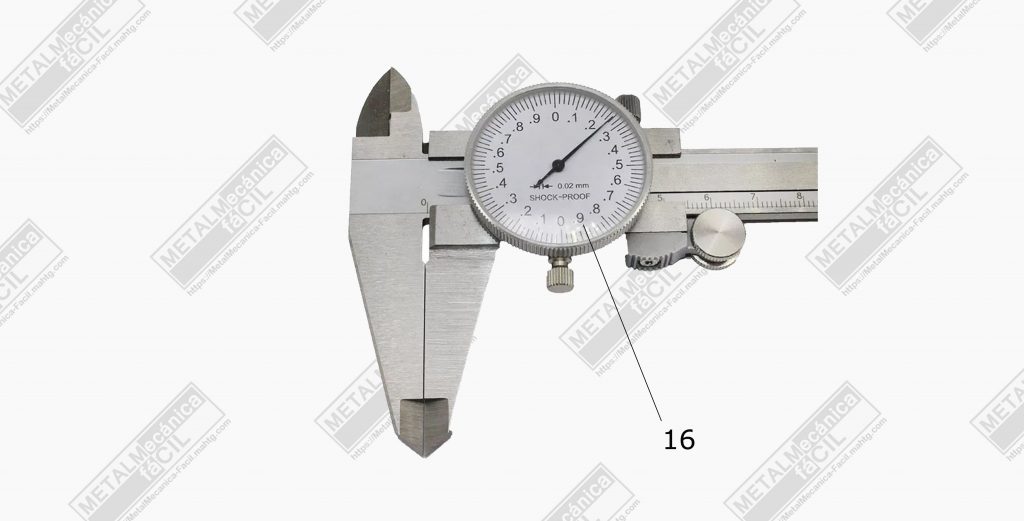
16. Dial gauge
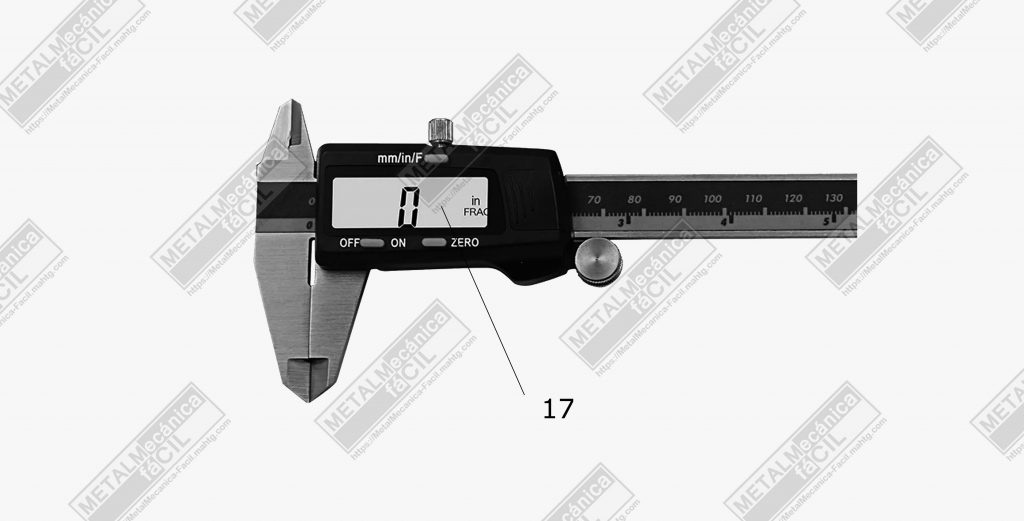
17. Digital display.
Vernier Caliper Functions.
This instrument generally has three main functions: The first function is to take outside measurements by using the longer jaws. The second function is to take inside measurements by means of the smaller jaws and the last function is designed to read or take depth measurements.
When the caliper exceeds a certain length, generally more than a foot (30 cm.), it only has the main jaws, that is, it allows taking otside readings, however, on the edge of the jaws, it has a recess that allows reading inside measurements. This type also has a system that allows a very fine adjustment of the measurement and that is made up of a very small step screw and a nut.
Parts Involved in Reading
The vernier caliper is made up of two main reading parts, one part is the main scale or ruler, which is graduated throughout the body of the instrument, it can be in a single system of measurements, such as metric or inches or both.
And the other part that complements the reading of the main scale or rule is the vernier scale.
This instrumet allows to take exact and very small fractional readings of the unit from which the reading is being taken.
Kinds.
There are different kinds of vernier calipers, among which can be distinguished, the conventional analogue vernier caliper, that is, one with a main scale and a common vernier scale.
The vernier caliper with dial gauge, which instead of having a vernier scale has a dial or a dial gauge, usually this type comes in a single measurement system and has a lot of precision and a very small appreciation. Appreciation is the smallest amount of measurement that can be read on a vernier caliper.
And the digital type which, like the previous ones, has a main scale, a screen where the reading is shown and buttons with which the unit can be turned on, zero the reading and change units (millimeters or inches ), as well as a port for data output.
In addition, among analog vernier calipers, there are also several classes, especially in relation to measurement accuracy, for example, the instrument that has an appreciation of 1/128 in or 0.05 mm., The one that measures in 0.001 in, or thousandths of an inch and the one that measures by 0.02 mm.
There is also a vernier caliper that is very used and it is the instrument to measure depths, this is made up of a ruler that is the main scale, a vernier scale that is part of the body in a “T” shape.
In this vernier caliper, the main scale is slid over the “T” and depth measurements are obtained.
And the last vernier caliper that I know of, is the one used to measure gears, it is made up of two vernier calipers located at 90 °, with one vernier caliper the height of the tooth is located and with the other, the width or thickness of the tooth is located. in the pitch diameter of the gear.
How do you read a value in the vernier caliper?
As I said before, there are several types or kinds of vernier caliper in terms of how to present the reading, here I leave several links for you to visit, in which you can learn how to do readings.
Reading fractional inch on the vernier caliper.
Millimeter reading on the vernier caliper.
Vernier Caliper Precautions
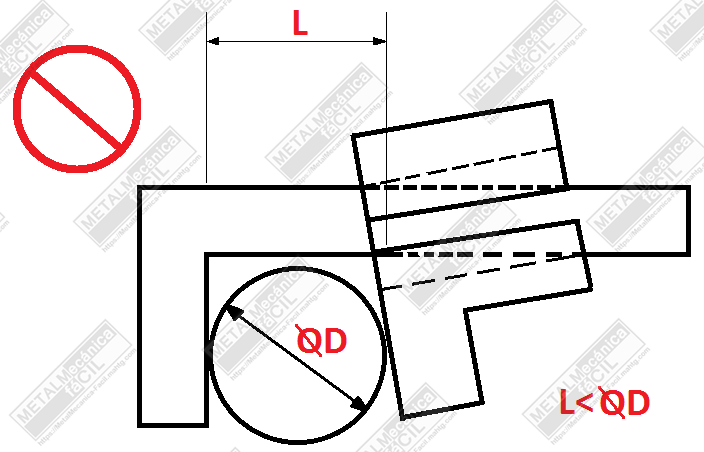
Excessive Measuring Force.
Do not apply excessive force to the workpiece. Excessive measuring force will develop measurement error because of the positional deviations of the jaws. It is not necessary to apply excessive force when measuring, this causes an error due to the deviation of the jaws.
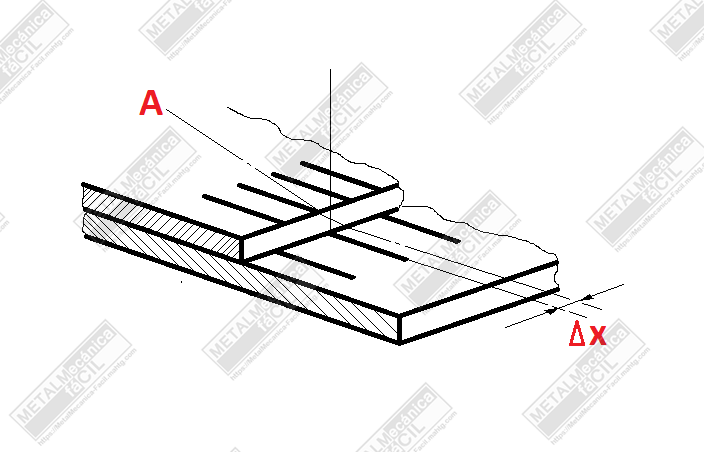
Parallax Error
Take reading of the vernier/main scales in a viewing direction perpendicular to the measure poin of the scales. Parallax error ΔX is caused when viewed in the direction of A. If viewing in an oblique direction is not avoidable, it is recommended to use parallax free vernier calipers.
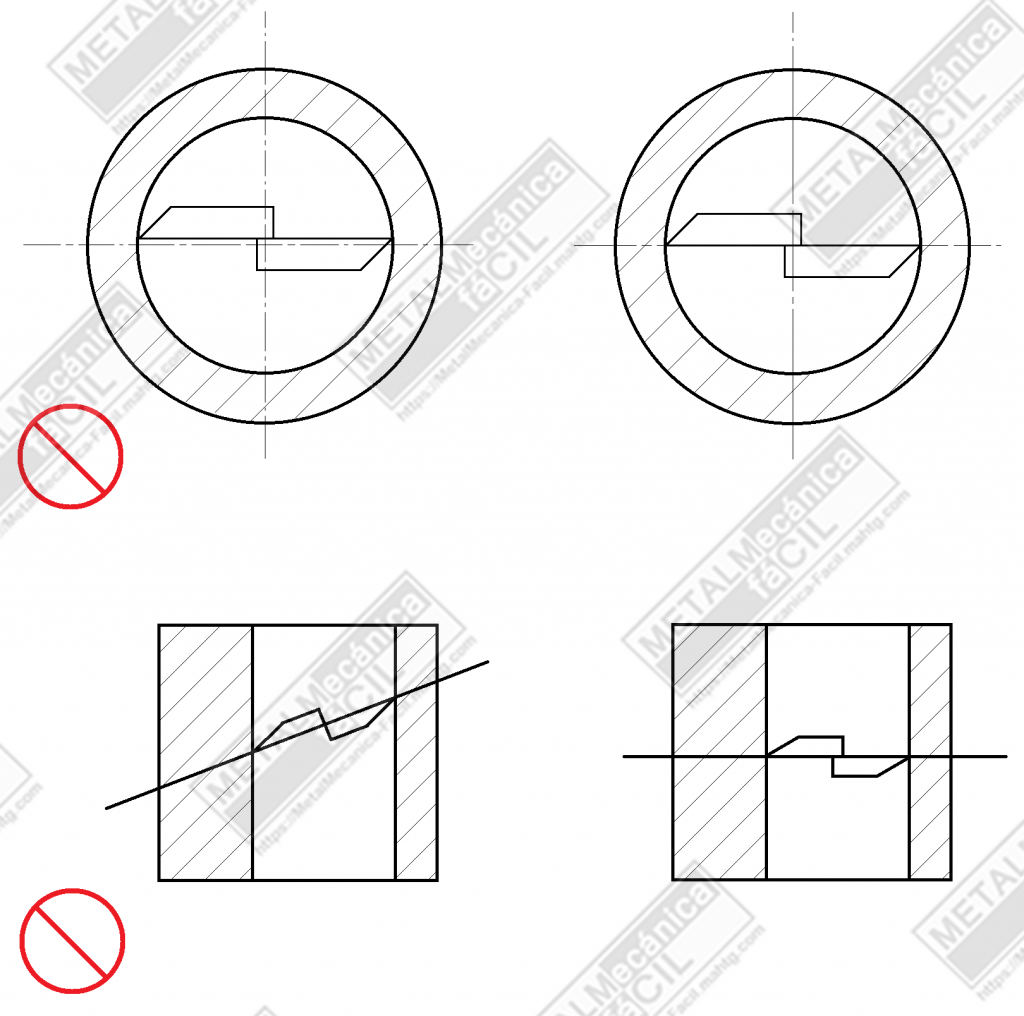
Outside Measurement.
Put the workpiece as close to the reference surface as possible, and have the measuring faces fitted with the workpiece.
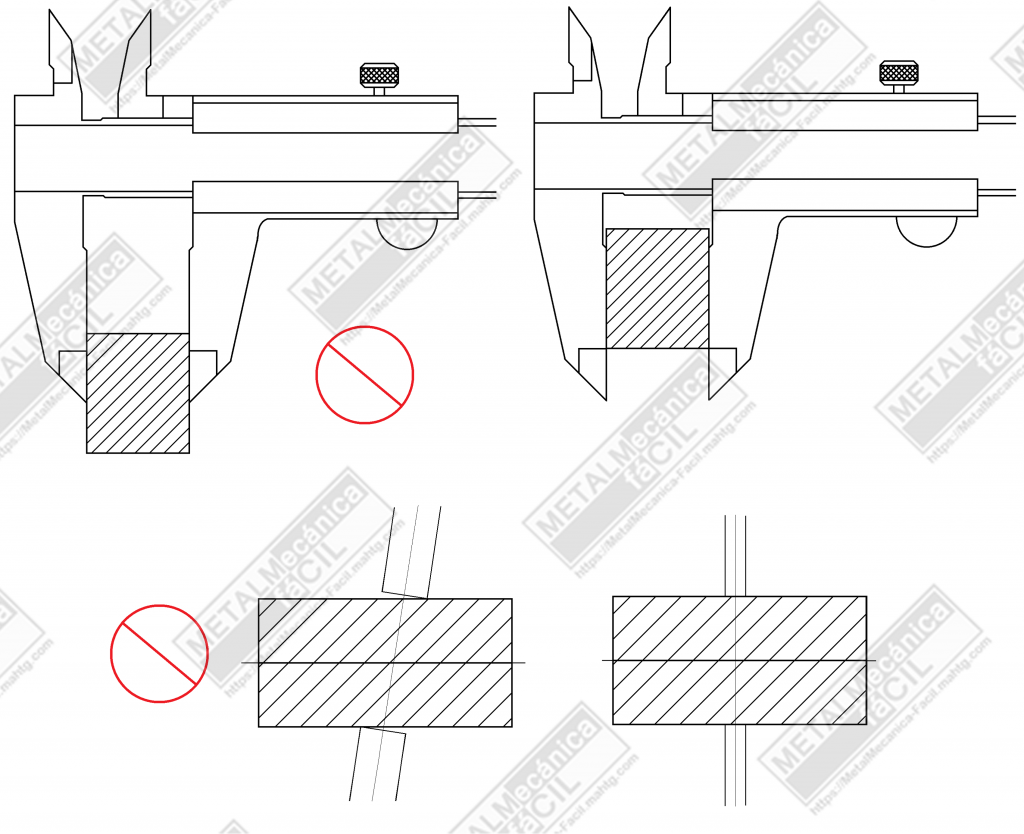
Inside Measurement.
Put the inside jaws as deep as possible and have the measuring faces fitted with the workpiece.
(1) Take the maximun reading (I.D.)
(2) Take the smallest reading (Groove)
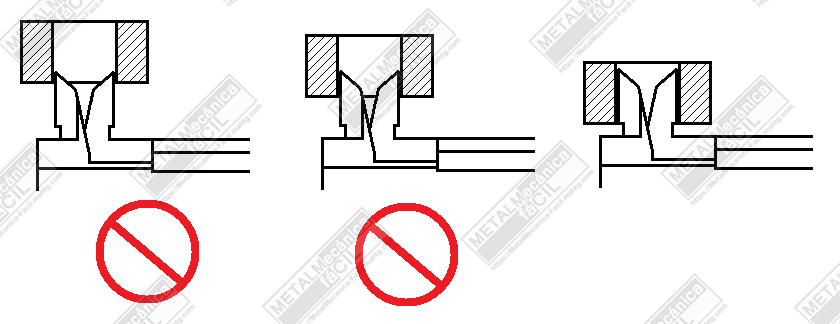
Depth measurement:
Set the depth bar perpendicular to the measured surfaces.
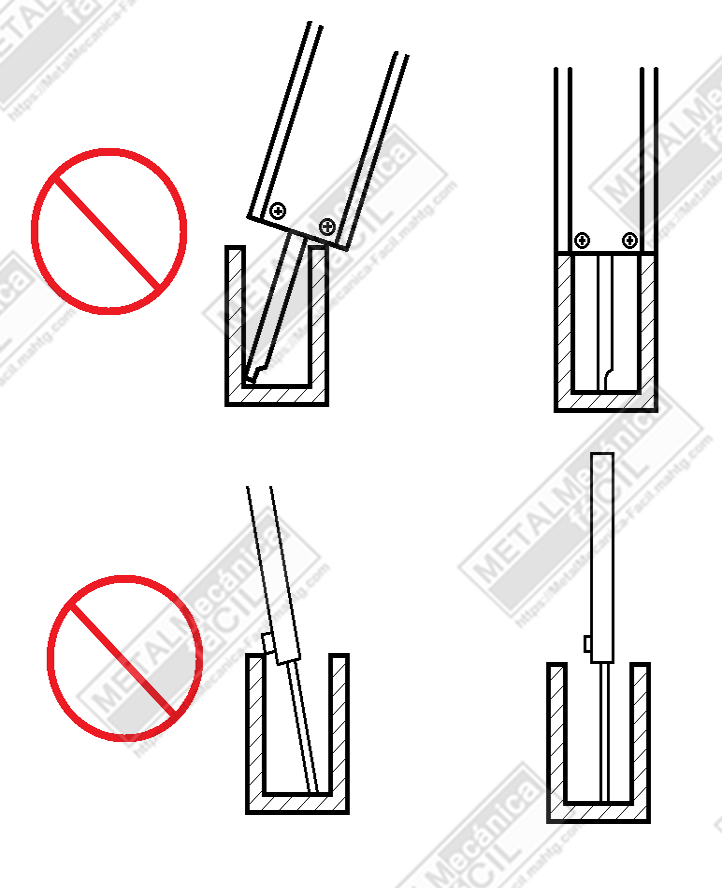
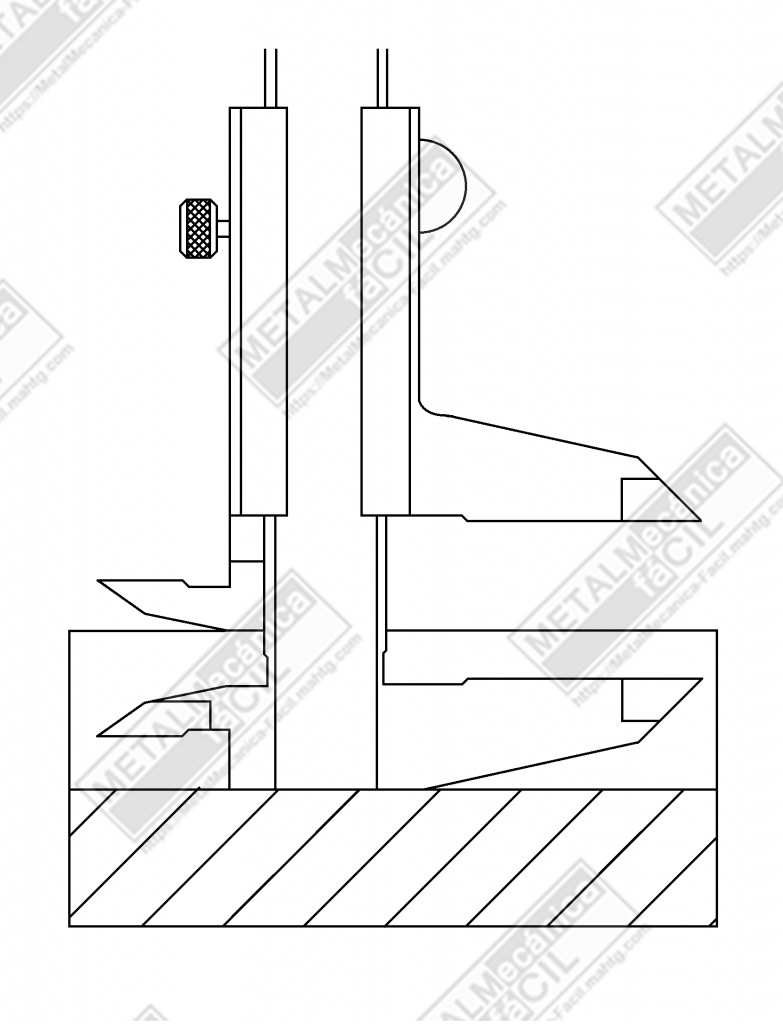
Step measurement:
Have the step-measuring-face fitted with the measured surfaces.
Positional error:
Measurement position of the large size vernier caliper should be consistent if positional error is to be avoided. Measurements in vertical position may differ from those horizontal position.
Safety warnings when handling a vernier caliper
The outside and inside measuring jaws of this caliper have a sharp edge. Handle it with great care to avoid injury.
Do not measure the workpiece if it is rotating. Risk of injury by being caught in the machine tool.
Some important aspects to keep in mind.
Before measuring, wipe chipping/dust/dirt off the sliding surfaces, measuring faces and graduated surfaces.
Before taking measurements with the vernier caliper, make sure that zero lines of the vernier and main scales coincide when the jaws are closed and there is no slit observed between the jaws against the light.
Before taking measurements with the depth gage, make sure that zero lines of the vernier and main scales coincide when the measuring face and reference surface are set even on a surface plane.
Do not use the vernier caliper on rotating workpiece; this is dangerous and measuring faces will be worn out.
Apply clean oil to the sliding surfaces especially the reference surfaces. Lack of oil cause scratches on the critical surfaces, resulting in unsmooth slider movements.
And finally, vernier caliper Quality.
Here I speak from experience, throughout my career as a machinist, I’ve run into lots of vernier calipers, and therefore with many qualities, obviously a vernier caliper brand such as for example: Mitutoyo or Starrett, do not present any problem in terms of quality, since when you buy a vernier caliper from these manufacturers, in addition to utility, quality, reliability and duration, you have the guarantee of a maximum precision instrument.
And on the other side, there are the cheap venier calipers, those that have “Screws” to fix the vernier scale to the body of the vernier caliper, and the truth is that these do not work but, why are they not useful?
We agree on one thing, time is valuable in everything, especially in the workshop, but if you have time to adjust these small screws that almost always loosen and also align the zero lines of the vernier scale with those of the main scale, so a cheap vernier caliper is a solution.
Now, there are medium quality venier calipers that do not have screws in the vernier scale (monoblock), these present a good quality, in fact they are the ones that I recommend in terms of value for money.
Well friends, with this I come to the end of this article. I hope you liked it and it served, and as always, if you liked this information, please remember to rate this post, with the highest score in the stars that are right here below.